| DesignSpark Mechanical Online Help |
|
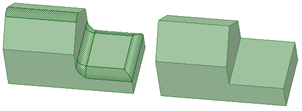
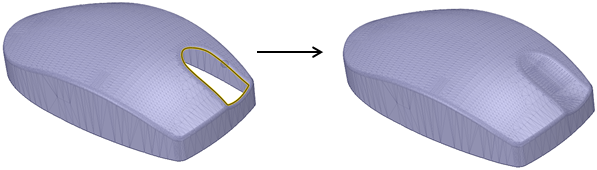
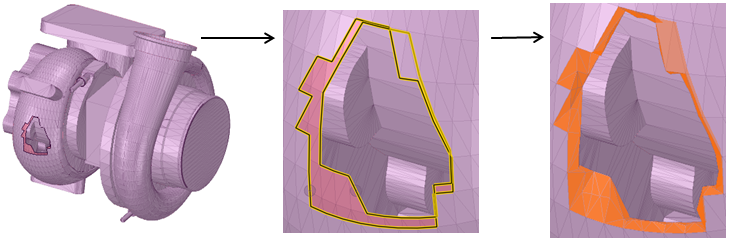
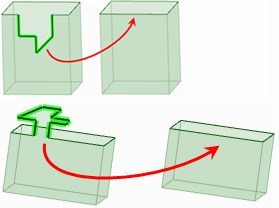
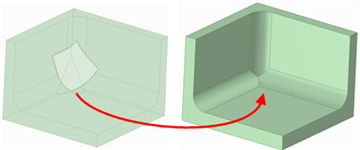
Use the Fill tool to fill in the selected region with the surrounding surface or solid. Fill can "heal" many cuts made into geometry, such as chamfers and rounds, subtractive revolves, protrusions, depressions, and regions removed by removing regions in the Combine tool. When using Fill to fill a gusset, the bend geometry on which the gusset is defined remains intact.
The Fill tool can also be used to simplify surface edges and cap surfaces to form solids. You can select a combination of faces and edges to replace them with a single new face.
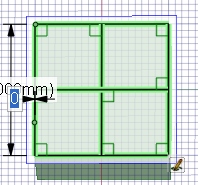
You can use the Fill tool in Sketch mode to fill a loop of sketch curves that is almost closed, but that has multiple small gaps. If the gaps are too large, multiple error messages appear to show you where the gaps are. You can also use it to concatenate multiple sketched curves.
You can also use the Fill tool when editing a layout. Fill functionality is useful when you sketch faces across section lines, but do not want the section lines to split the surfaces when you switch to 3D.
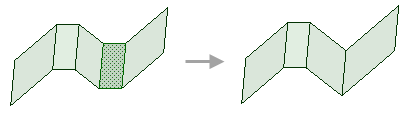
When you change the geometry of a model, for example, the model’s length, height, or width, the model’s fill pattern will automatically update to correctly re-fill to the model’s new geometry.
Click on one of the links below for detailed information about working with the Fill tool:
You can also use the Delete key to fill faces on a solid or surface.
Select the edges that define a surface region, or the faces that define a region within or on a solid.
You can select an object in the Structure tree to simplify it.
You can select faces and the Fill tool will automatically create a patch if you also select at least one edge.
Click the Fill tool ![]() or press F.
or press F.
Select a closed or almost closed loop of sketch lines.
Click the Fill tool ![]() or press F.
or press F.
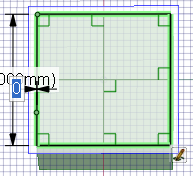
If a gap is 1.5 times the length of the minor grid spacing on the sketch grid or less, the edges are extended to close the gap. If the gap is larger, a message appears in the status bar and the gap's endpoints flash.
The mode is switched to 3D mode, and the filled loop becomes a surface.
You can select the face of a solid when only the edge is displayed (such as in a drawing sheet view) using the scroll wheel. The edge becomes a slightly thicker line when the face is highlighted. If you fill lines in a layout, you can then pull the surface into 3D from the layout, but remain in edit layout mode after this action.
You can fill lines and edges whether or not the sketched lines you want to fill were sketched in the same plane as the edges. (If the lines are imprinted on a face and become edges, filling those edges deletes them.)

|
Click the Fill tool in Sketch mode to fill any closed or almost closed loops and switch to 3D mode. |
Within the Fill tool, there are several tool guides that let you specify the behavior of the Fill tool:
|
|
The Select tool guide is active by default. When this tool guide is active, you can select edges and faces to be filled. You can click an edge loop or use box-select to select multiple objects. |
|
|
The Select Guide Curves tool guide allows you to select a guide curve. |
|
|
The Complete tool guide generates the filled face. |
The following options are available in the Options panel:
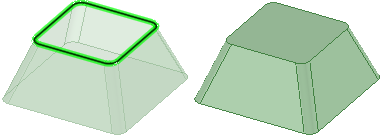
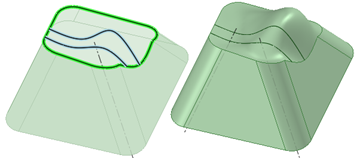
: Select this option to use the initial tangency of the neighboring faces to fill the selected edges with a patch blend. This option blends all the faces into a smooth, single-face patch, instead of extending the faces that "own" the edge until they intersect. Alt+click the points that you want to blend through. This option is automatically selected when you hold the Alt key or use the Select Guide Curves tool guide to select a reference curve.
The tangency of neighboring faces is ignored unless you hold Alt or click the Select Guide Curves tool guide and select them.
Show deviation: Shows a deviation analysis of the surface or face you created with the Patch blend option. The new face is temporarily colored to indicate the distance from points on its surface to the faces it was created from. Use the Color and Scale controls to change how the analysis is displayed.
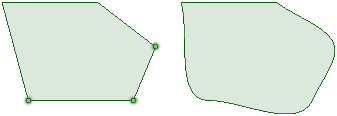
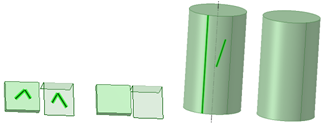
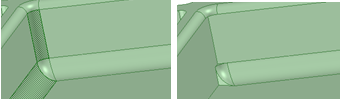
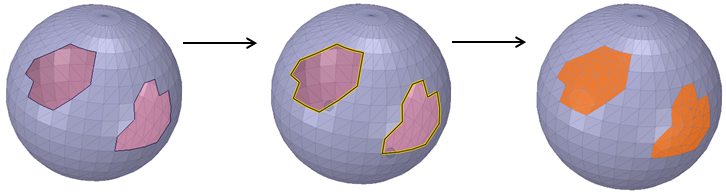
Simplifying edges

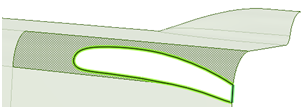
Simplifying edges across multiple faces
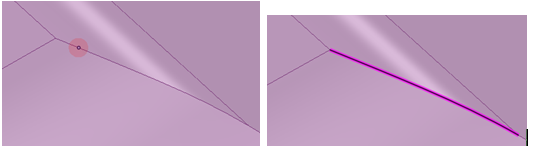
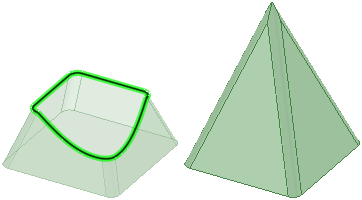
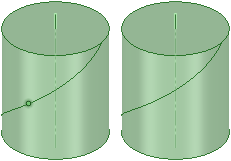
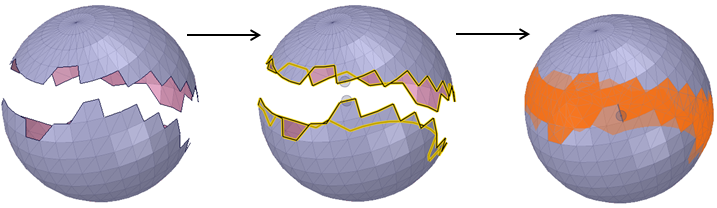
Filling with straight and curved edges
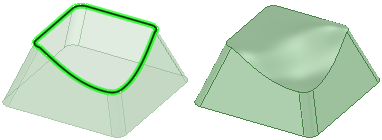
Filling with curved edges as guides
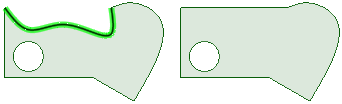
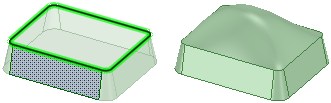
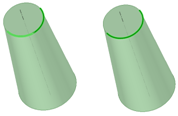
Capping a surface
Capping a surface that crosses multiple edges
|
|
|
|
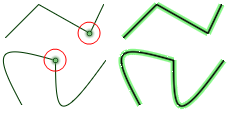
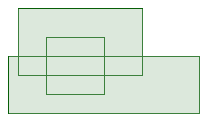
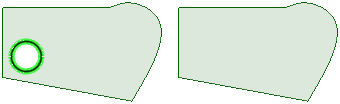
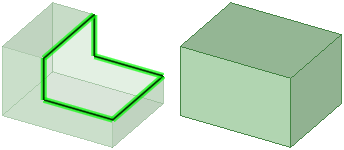
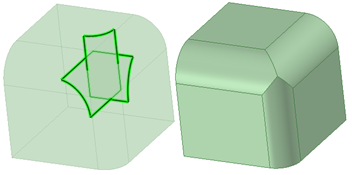
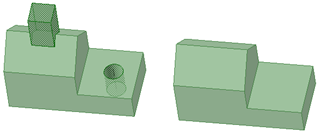
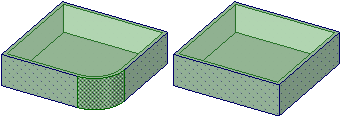
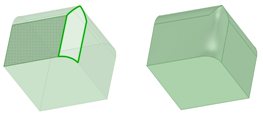
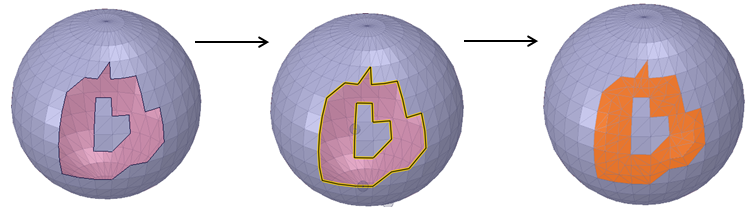
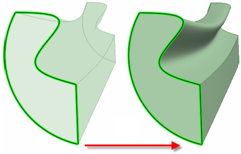
Selecting internal edges to keep them after filling. |
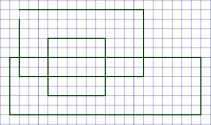
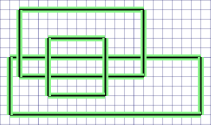
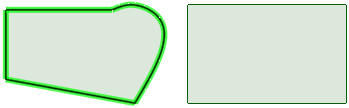
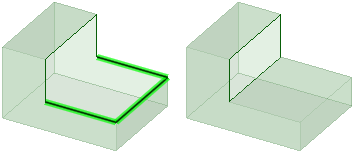
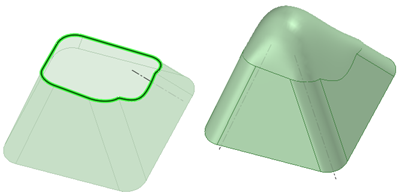
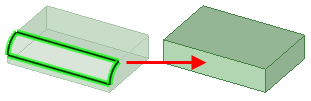
Selecting lines to simplify a surface by filling. Internal edges are removed. |
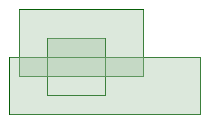
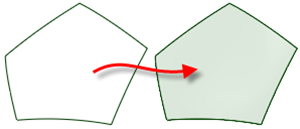
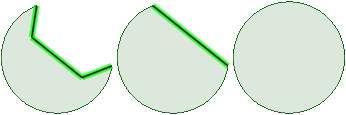
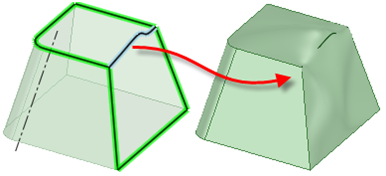
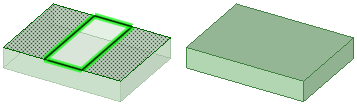
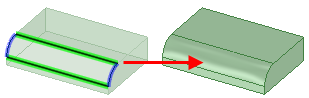
Filling edges to form a solid
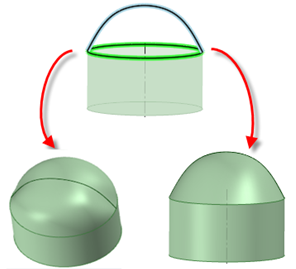
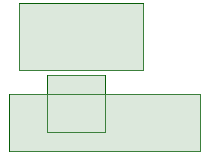
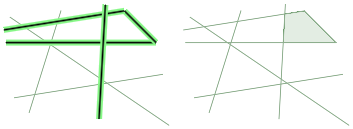
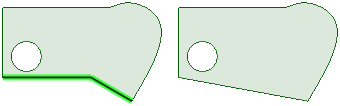
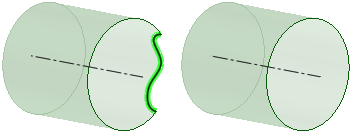
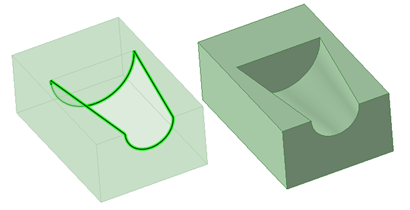
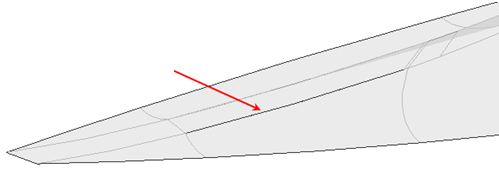
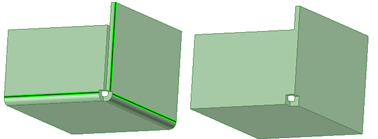
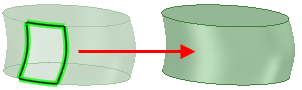
Patch blend with and without tangent extension. The Tangent extension option is select on the left, and not selected on the right.
© Copyright 2014 Allied Electronics, Inc. All rights reserved.
 Sketch and layout curves