


You can draft faces around a plane or another face, edge, or surface with the Pull tool. Drafting changes the angle of the selected contiguous faces. For example, a mold designer drafts faces to facilitate removal of parts from the mold.
To draft a face
-
(Optional) Insert a plane around which you want to draft faces.
You need to do this when you want to draft around a plane that doesn't already exist as geometry in the design.
-
Click
 Pull in the Edit group on the Design tab. The Select tool guide on the right side of the Design window should be active.
 -
Select the face or contiguous faces you want to draft.
-
Alt+click the plane, face (including rounds), or surface about which you want to draft.
You can also select the Draft tool guide
 , then click the face or surface. The draft plane, face, or surface is shown in blue.
Tip: When you need to select more than one face or surface for the Alt-reference (or after selecting the Draft tool guide) then you have to hold the Ctrl and the Alt keys while selecting the additional references.
If you select one edge loop, you can create an edge-driven draft. If you select two edge loops, you can create a split draft.
-
Click and drag in the direction of the Pull arrow to draft the selected faces.
To dimension the draft, type the rotation angle while you are pulling and press Enter.
Options
The following options are available in the Pull tool. Once you select the edge or face to pull, select these options from the Options panel, or right-click and select them from the mini-toolbar:
-
 Add: Select the Add option to only add material. If you pull in a subtractive direction, no change will occur. You can combine this option with other Pull options.
 -
 Cut: Select the Cut option to only remove material. If you pull in an additive direction, no change will occur. You can combine this option with other Pull options.
 -
 No merge: Pulls without merging into other objects even when the object pulled intersects with an existing object.
 -
 Up to: Pulls the element so it mates with the surface of the selected body or be pulled up to a plane through the selection. You can find this option in the mini-toolbar and it is the same as the Up To tool guide.
 -
 Draft both sides: Select this option to pivot the face on the opposite side of the reference face as well as the selected face.
Examples
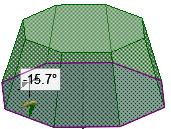
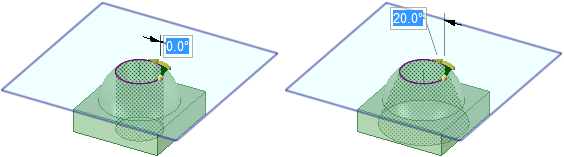
Drafting a face about a round.
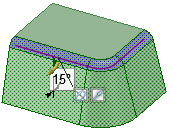
Drafting non-contiguous faces.
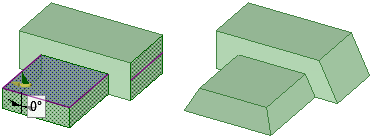
Drafting around a plane that does not touch the faces being drafted.

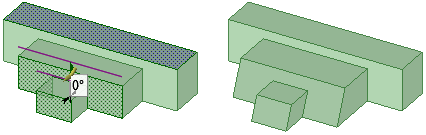
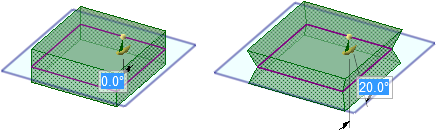
Drafting faces around a plane. The drafted faces pivot around the face or plane you select as the draft plane.
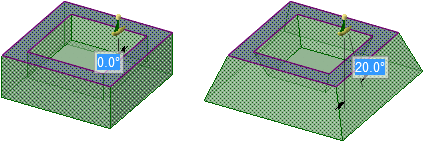
Drafting both sides around the plane.
Drafting a face where a plane must be selected as the draft plane. See Inserting a plane for instructions to create a plane.
Drafting the offset faces (inside and the outside) of a shelled solid.
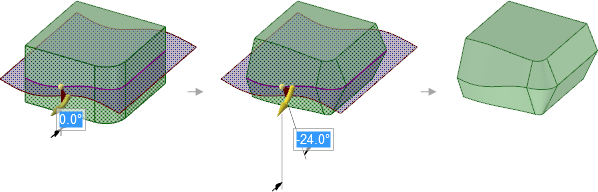
Drafting around a spline surface with the Draft both sides option selected

Drafting a set of surfaces about a planar surface not attached to the solid