| DesignSpark Mechanical Online Help |
|
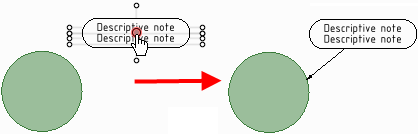
Use the Note Leader tool to create an arrow from your note.

Click ![]() Note Leader in the Annotation group on the Detailing tab.
Note Leader in the Annotation group on the Detailing tab.
Mouse over notes on the active annotation plane to see the possible ways to connect the note leader to the note.
Click a note's connection point to draw the first segment of the note leader.
Mouse over your design to highlight the geometry to which you can attach the end of the note leader. You can also attach leaders to temporary objects.
For a segmented line, click to set each point of the note leader line.
End the note leader by clicking a vertex, edge, or face to attach the end of the note leader, or double-click to end the note leader at any point.
The end of the note leader is an arrow unless you attach it to a face.
While creating a Leader, hold the Shift key to snap the Leader to the nearest 45° increment.
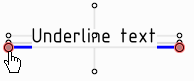
When you start the leader, hovering near the note text displays attachment points. The image above shows the underline location highlighted.
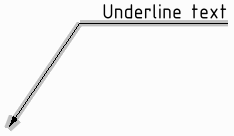
Select the leader and use the context menu to select Underlined. This toggles the leader to an underlined leader.
Right-click the note leader and select All Around.
Drag a segment of the note leader line to move it and its surrounding boundary points. Right-click the note leader and select Add Jog Point to create a new segment.
You can delete note leader line segments by deleting the jog points that border the segment.
Right-click the note leader and select Properties.
Modify the Arrow Style, Length, and Width values.
Set the All Around value to True to display an all-around symbol. Select False to hide it.
Select the Note Leader tool  from the Annotation ribbon group in the Detailing tab.
Ctrl+click a line.
Ctrl+click a converging line.
The head of the note leader is attached to the virtual sharp. You can also drag the virtual sharp’s end point, draw another leader to the virtual sharp, create virtual sharps in cross-section, for rounds, and between an angled and straight edge.
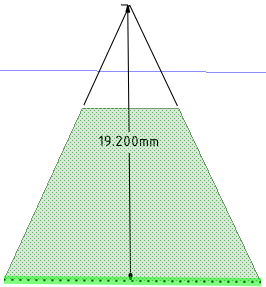
A virtual sharp
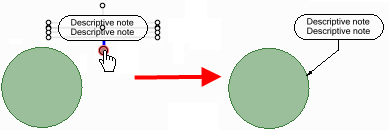
Attaching to the bottom connection point of a note to create a leader with a jog or shoulder.
Attaching to the center connection point of a note to create a straight leader.
Use the center connection point to create circle flag notes or BOM balloon notes according to the JIS standard, without a jog or shoulder.
© Copyright 2020 Allied Electronics, Inc. All rights reserved.