
| SpaceClaim Online Help |
|
The Relief tool identifies thickness edges at concave corners. Edges found can then have a cylindrical cutout made to provide relief at the corner.
Multiple pairs of thickness faces in the same body are included.
An example is shown below.
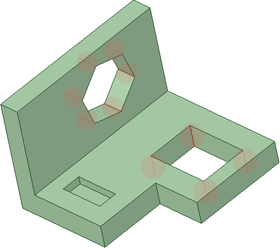
Internal thickness edges at concave corners.
By default, the tool identifies edges that are Interior to the part. The tool Options allow you to look for External edges as well. An example is shown below.
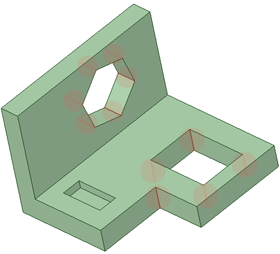
External thickness edge at a concave corner.
Edges that Do Not go all the way through the thickness of the part are filtered out of the tool. The example above shows this with the small pocket on the left side of the part.
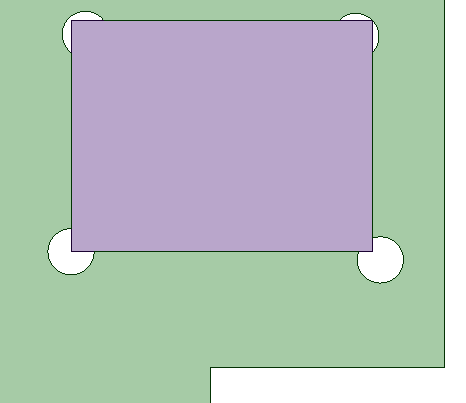
The size and position of the reliefs placed on the edges can be controlled with the following options.
An example is shown below with a solid block inserted into the cutout. The corners of the block represent the locations of the original edges.
Beginning at the upper left corner and moving clockwise through the four corners the settings are:
Open the Insert tab.
© Copyright 2014 SpaceClaim Corporation. All rights reserved.