| SpaceClaim Online Help |
|

|
Refer to the Class Library
For SpaceClaim: C:\Program Files\SpaceClaim 2016.2\SpaceClaim.Api.V15
For SCDM: C:\Program Files\ANSYS Inc\v172\scdm\SpaceClaim.Api.V15
You can also download the latest version here: https://s3.amazonaws.com/help.spaceclaim.com/downloads/API_Scripting_Class_Library.chm.
If you have trouble viewing the file, check the file properties to see if it needs to be Unblocked. |
You can work with SpaceClaim programmatically using Python. A built-in script editor allows you to create and run scripts to perform repetitive tasks and work with models and geometry.
Use File>New>Script to begin a new script.
When running SpaceClaim within AIM, use Model>Show Script Editor to begin a new script.
Use File>Open to open an existing script file (*.scscript, *.py).
When you exit SpaceClaim with an open script, you are asked if you want to save the existing script.
The Script Editor has the following functions.
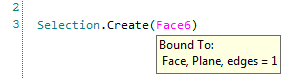
Smart Variable selection is needed to make selections more stable for replaying changes. A Smart Variable selection stores more information than any of the other types and is much more robust in matching the selected entity during geometry changes.
The image below shows how each selection is scripted for the same selected face. Notice that the Smart Variable selection uses a variable called “Face1”

 - Executes the next line of the script
Script is written in the main Script Window but can also be entered as single commands in the command line.
Intellisense is included in the editor to assist with entering commands.
The editor supports the following shortcuts:
Results of running a script, including error and warnings, are written to the Output Window.
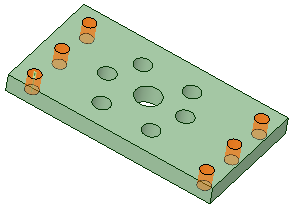
Power Selection is recorded and, when using Smart Variables, can be used to perform similar operations on multiple bodies.

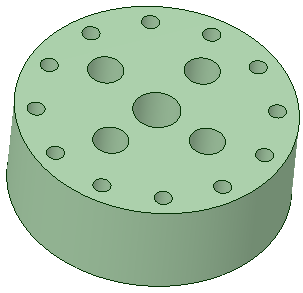
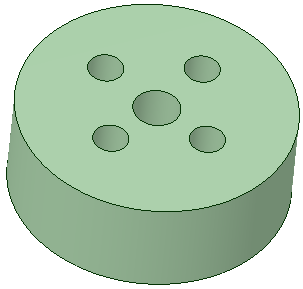
For example, you can record the power-selection of holes with a certain diameter, and then the filling of those holes with the Fill tool. That script can then be used to fill holes of the same size in other models, even if the number of holes is different.
|
The example below shows six holes power-selected, filled and recorded. |
|
|
|
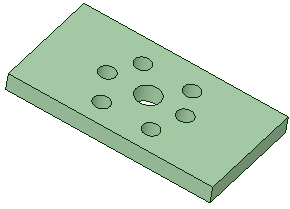
| The script is then run on a different model and 12 holes with the same diameter are filled. | |
|
|
Scripting supports recording and playback for imported models with persistent ID maps. This allows the following:
Notes:
Limitations:
hierarchy in the source system cannot change between imports V5Snippets are chunks of code that can be inserted into your script. They are presented in a dropdown folder browser with tooltip help describing the function of each Snippet.
You can write your own Snippets and add them to a custom snippet directory. Use the Support Files Paths set in SpaceClaim Options > Support Files to create a directory for storing your Snippets.
To create a snippet, use the following template XML and change the Title, Description, and Code.

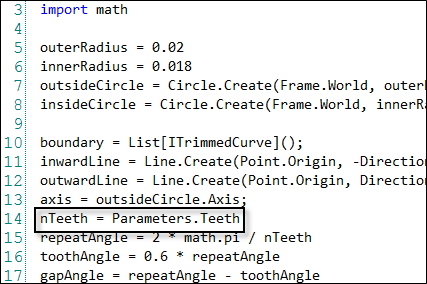
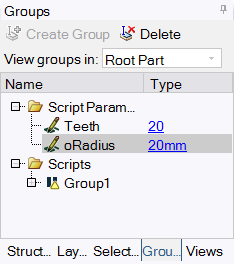
Scripts can be saved to Groups to store them in the model. In the Script Editor, open the dropdown menu on the Save button and check Save Script to Group. Click the Save button to create the group and add it to the Scripts folder in the Groups Panel.
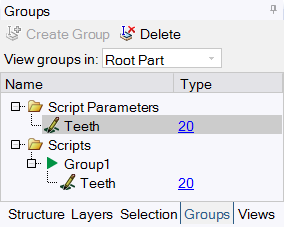
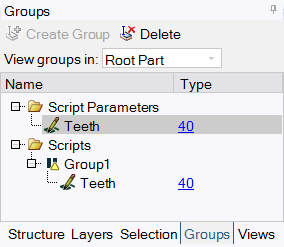
Variables used in scripts can be saved to Parameter Groups. This allows you to easily modify the values without editing the script.
© Copyright 2017 SpaceClaim Corporation. All rights reserved.
 Snippet example