


Moving Objects
-
Click
 Move in the Edit group on the Design
tab.
Move in the Edit group on the Design
tab.
Examples
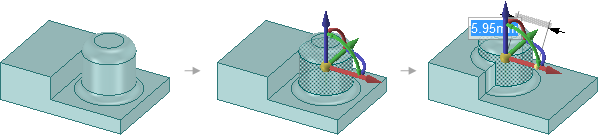
Moving a protrusion with rounds that intersects with a stepped solid with the Detach first option
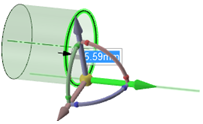
Moving a circular edge along a surface
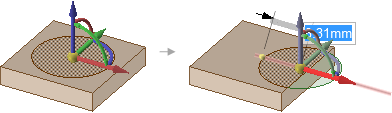
Moving an imprinted face off of a solid face creates a surface.

Moving imprinted edges on a face, and other intersecting imprinted edges are adjusted as needed. The examples above show how the edges are adjusted when the imprinted areas are moved.
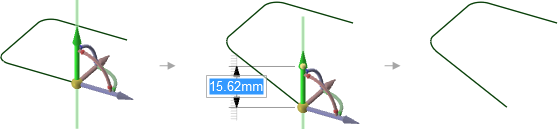
Moving the end point of a line segment that has a tangent arc on its other end changes the arc so that it remains tangent to the line segment as you move its end point.
Moving Relative to Other Objects
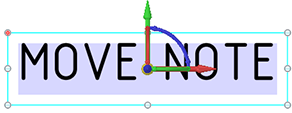
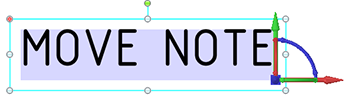
Snap to a co-planar face: Hold Shift while dragging to snap to co-planar faces when you have the Move handle anchored to a planar face.
Move an object up to another object: Click the Up To tool guide to move objects so the center of the Move handle is adjacent to the object.
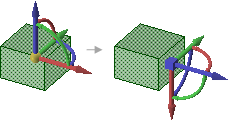
Orient an object to another object: Select the object to move and a Move handle axis, then click the Orient to Object tool guide and select a second object. The selected object will be rotated so the selected Move handle axis is aligned with the second object.
Changing the Anchor Location of the Move Handle
Drag the yellow center sphere on the Move handle to snap it to other geometry
- Annotations have multiple Drag Points. The Move handle can be dragged near, and snapped to, any of these.
Click the Anchor tool guide and select the face, edge, or vertex on which to place the Move handle.
You can also click the Origin
 tool in the Design tab to insert an origin anywhere in your design
that you want to anchor the Move tool.
tool in the Design tab to insert an origin anywhere in your design
that you want to anchor the Move tool.
The yellow center sphere turns into a blue cube when the Move handle is anchored.
Changing the Direction or Trajectory for the Move
Drag one of the small balls on the rotational axis to reorient the Move handle, or dimension the orientation by typing the rotation angle while you are dragging, then pressing Enter.
You can also Alt+click a point or line, or click the Move Direction tool guide, then click a point or line, to orient one of the Move handle's axes toward that point or along that line.
If you Alt+click a trajectory, you can move along the trajectory. Ctrl+Alt+click to add contiguous lines or edges to the trajectory.
If you Alt+click a plane, the direction of movement is set perpendicular to the plane.
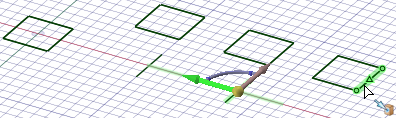
Example
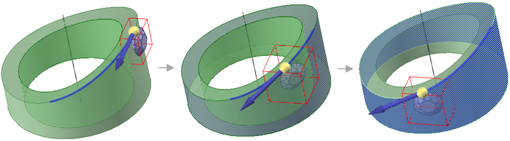
Normal to Surface - While moving the diamond along the selected trajectory, Ctrl+Alt+click the face of the cylinder to set the orientation of the diamond normal to the cylinder.
Dimensioning a Move
Follow the steps to move an object.
After you click an axis on the Move handle, click Ruler in the Options panel.
Click an edge or face to anchor the ruler.
The ruler is oriented along the selected Move handle axis.
Type a distance and press Enter.

Copying an Object Using the Move Tool
Press Ctrl to copy the object selected for movement and place it at the location at which you drag or dimension the move.
You can press the spacebar to dimension the move.
Double-click the Up To tool guide to make multiple copies of the selected object. To exit this mode, select another tool or click in empty space in the Design window.
Examples

Copying the red face multiple times by double-clicking the Up To tool guide to keep it active for more than one move
Making copies by double-clicking the Up To tool guide also works with sketches