| SpaceClaim Online Help |
|
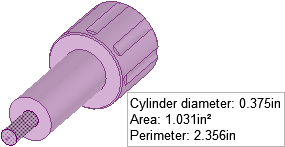
Measure the small cylinder on the end of the knob.
Change the display and move the bracket so you can see what you're doing.
Right-click Bracket in the Structure tree and select Activate Component from the drop-down menu.
An orange box appears around the Bracket.
Rotate the bracket so you can see its back.
Click the back of the bracket then click Sketch Mode ![]() in the Mode group. The grid appears on the back of the bracket.
in the Mode group. The grid appears on the back of the bracket.
Click the Display tab.
In the Grid group, select Clip Scene Above Grid. The knob temporarily disappears.
You may also want to select Fade Scene Under Grid. This will fade the bracket and make it easier to see the sketch profiles you draw.
Return to the Design tab and select Back from the Trimetric tool menu in the Orient ribbon. The back of the bracket now faces you.
Create a hole in the back of the bracket so you can insert the knob into it.
Click ConstructionLine ![]() in the Sketch group.
in the Sketch group.
Move the cursor over the top line on the back. The cursor snaps to the center of the line.
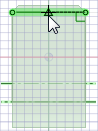
Click to start the construction line. Be careful to click on the top of the back and not on the top of the chamfer.
Drag to draw a construction line to the bottom of the surface.
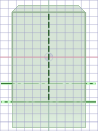
The line snaps to the center of the bottom edge. Press Esc to exit the tool.
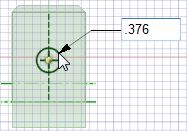
Click Circle ![]() in the Sketch group and position the mouse at the top of the construction line. (Do not press a mouse button.)
in the Sketch group and position the mouse at the top of the construction line. (Do not press a mouse button.)
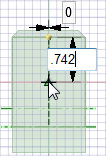
Press and release the Shift key to dimension from another point, then move the mouse slowly in the direction you want to place the circle.
In the dimension box, type the value where you want to locate the circle center (.742). If you need to, press Tab to switch dimension fields.
Press Enter. The cursor is moved to center of the hole.
Move the mouse slowly and a second dimension box appears into which you can type the diameter of the circle (.376). Press Enter. Press Esc to exit the tool.
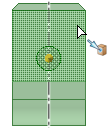
Click Pull ![]() in the Edit group (the view returns to 3-D) and then click on the center of the circle so the direction arrows are over the circle.
in the Edit group (the view returns to 3-D) and then click on the center of the circle so the direction arrows are over the circle.
You may need to hide the knob so you can see the bracket. Deselect the check box next to the TutorialKnob component to hide it.
Select the Up To tool guide on the right side of the Design window. Move the mouse to the side of the model and roll the middle button to select the hidden surface. When it is highlighted, click. The circle goes to the surface and becomes a hole.
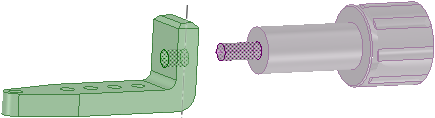
Create an assembly.
Click the check box next to the TutorialKnob component in the Structure tree to make it reappear in the display.
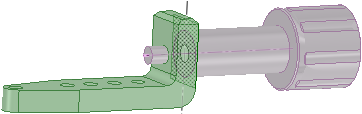
Drag with the middle mouse button to spin the model so the knob is on the right and the bracket is on the left.
Click Select ![]() in the Edit group (or press S), select the surface of the small cylinder on the end of the knob, then hold Ctrl and select the inside surface of the hole.
in the Edit group (or press S), select the surface of the small cylinder on the end of the knob, then hold Ctrl and select the inside surface of the hole.
Click Align ![]() in the Assembly group.
in the Assembly group.
The knob moves so the axis of its end is aligned with the axis of the hole.
Select the flat surface of the knob just behind the small cylinder.
Move the mouse to the side of the bracket, turn the scroll wheel to highlight the back of the bracket. Hold Ctrl and select the back of the bracket.
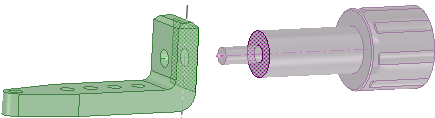
Click Tangent ![]() in the Assembly group.
in the Assembly group.
The knob slips through the hole in the bracket.
The surfaces that move are those of the model you pick first.
Spin the assembly around to see that you assembled the bracket and the knob.
Save your work.
| « Previous step | Next step » |
© Copyright 2015 SpaceClaim Corporation. All rights reserved.