
| SpaceClaim Online Help |
|
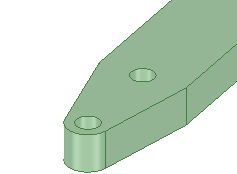
Copy the existing hole.
Select the cylindrical inner surface of the hole.

Click the Move tool from the Edit ribbon group.
While holding down the Ctrl key, select and drag the arrow (vector) in the Move handle.
The hole is copied along the arm of the bracket. You can see previews of the hole as long as the geometry is valid.
Stop dragging anywhere to complete the copy.
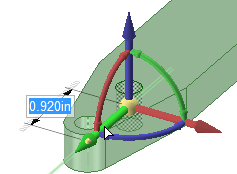
Position the hole accurately.
Click on the same arrow or vector in the Move handle.
In the small toolbar that appears, click the ![]() Ruler Dimension tool.
Ruler Dimension tool.
A dimension will appear and snap to geometry as you hover over various entities.
Select the point created earlier or either of the edges that are coincident with it.
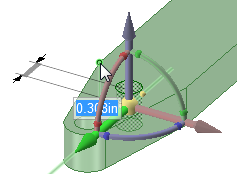
The dimension freezes and waits for a new value to be entered.
Enter a value of zero to align the axis of the hole with these edges.
You can also offset selected geometry from a reference by entering a value using the same method.
Increase the size of the hole.
Press P to select the Pull tool and select the cylindrical surface of the hole.
Drag in the opposite direction of the arrow to increase the size of the hole to a dimension of your choice.
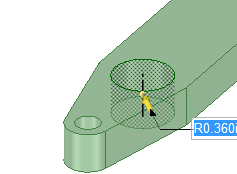
Use Ctrl+Z to undo the previous operation and return the hole to its original size. If you go too far, use Ctrl+Y to redo steps.
Save your work.
| « Previous | Next » |
© Copyright 2016 SpaceClaim Corporation. All rights reserved.