
| SpaceClaim Online Help |
|
Extrude an edge to form a surface.
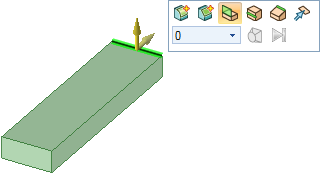
Click the back edge of the solid with the Pull tool to select it.
The edge is highlighted and edge options appear in the Options panel and mini-toolbar. Move your mouse closer to the mini-toolbar to make it more opaque.
If you moved the model in the Design window, click the Home button in the Orient group on the Design tab. You can also press H. This orients the model to its default view and sizes it to fit inside the Design window, as shown in the images.
Select the extrude edge option ![]() in the Options panel.
in the Options panel.
(You can hover over any option to display a tooltip that explains the option.)
The Pull arrows change to indicate the two default directions in which you can extrude the edge.
Drag the edge upward to begin creating a surface.
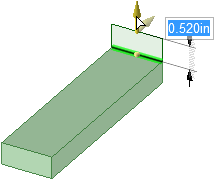
While dragging, press and release the spacebar to display a dimension field.
You can press the spacebar to edit a dimension whenever a dimension is displayed.
Type 1.4.
Press Enter to complete the surface.
This surface now appears in the structure tree, below the solid.
Pull the surface into a solid.
Click the surface you just created and drag toward the front of the solid as shown below.
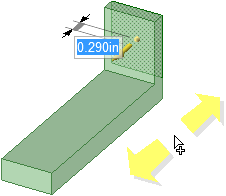
Enter .483 to match the thickness of your first solid.
Press Enter to finish pulling and create the surface.
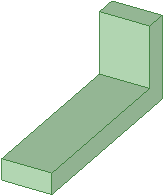
In the Structure tree, the surface disappears and this new solid is automatically merged with the first.
Save your work.
| « Previous step | Next step » |
© Copyright 2015 SpaceClaim Corporation. All rights reserved.